CI: Relationships
Use this function to manage the relationships between sources and targets. The Discovery application detects the Connected To, Runs On, Communicates With, Installed On, Component Of, Physically Connected To, Attaches and Used By relationships during a scan.
Neighbor Discovery
Neighbor discovery for Cisco switch-stack CIs now shows each neighbor's correct Local Interface, and these relationships are reflected in the Network View.
Neighbor discovery also now captures the neighbor IP address from Cisco Nexus (NX-OS) CDP output, which reports it as IPv4 Address: / IPv6 Address: instead of the classic Cisco IOS IP address: format. As a result, running Process Network Connections now creates a Switch to Switch Connected To relationship, matching existing behavior for Cisco IOS/Catalyst devices.
Network View
Network View also follows the Abstract Of and Contains relationships for a Switch Stack, Chassis Cluster, Firewall Cluster, or Access Point Cluster CI, so opening Network View on the cluster shows its master device and member devices along with the master's own neighbor connections. This does not apply to other Contains relationships (for example, a cloud VPC's containment of its instances), which remain off the Network View map. Note: Core Switch is not part of this family, so a cluster whose master or member is a Core Switch does not show Abstract Of / Contains on Network View, although its neighbor connections still display normally.
Network View neighbor traversal for network devices (VLAN, Router, Switch, switch stacks, firewalls, and Access Point Cluster / Wireless Controller / Access Point) can now continue past an Access Point Cluster instead of stopping there.
Viewing Relationships
|
1.
|
In the navigation pane, select ITSM > Configuration Management > CMDB. The Configuration Items window displays. |
|
1.
|
In the navigation pane, select Configuration Management > CMDB. The Configuration Items window displays. |
|
2.
|
Select a record in the list. A new window opens and the Details tab displays. |
|
3.
|
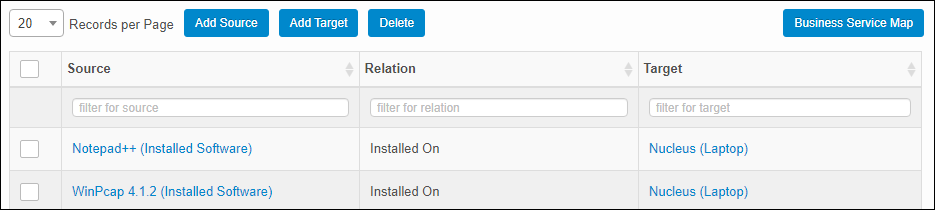
Click the Relationships tab. A list of all existing relationships displays. |
|
5.
|
To remove any relationship, select it in the list, and click Delete. |
Add Source or Add Target
|
1.
|
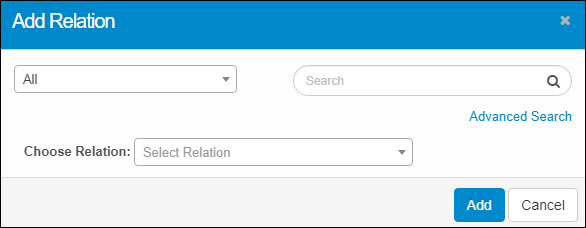
Click the Add Source or Add Target button. The Add Relation dialog box displays. |
|
2.
|
From the drop-down list, select either the Source or Target. |
|
3.
|
From the drop-down list, select the applicable blueprint from the available list. |
|
4.
|
In the Search field, enter the search criteria to locate the corresponding asset. |
|
5.
|
From the Choose Relationship drop-down list, select the relationship the Source or Target will have such as Assigned To, Belongs To, and so forth. |
|
6.
|
From the Relation drop-down list, select the relationship the Source or Target will have such as Assigned To, Belongs To, and so forth. |
|
7.
|
When all selections are made, click Add. |
Related Topics
Other Functions and Page Elements